
1101 W. Sanilac Rd. Caro, MI 48723
989.673.6690
Walk Path Lights are compact outdoor fixtures that guide people along garden paths, driveways, and steps after dark. They add a soft line of light rather than illuminating an entire yard. That distinction matters. A well-placed fixture can make a stone edge easier to see without creating harsh glare at eye level.
Most systems use one of two power sources: a small solar panel or a low-voltage connection to a transformer. Solar models collect energy during daylight and store it in an internal battery. Wired models receive electricity through outdoor-rated cable, usually at a lower voltage than standard household outlets. Some lights switch on automatically at dusk; others use timers or motion sensors. Their basic job is simple: turn electrical energy into visible light, then direct it toward the ground or nearby surfaces.
The details shape how well they work. A shaded panel may charge poorly, while widely spaced fixtures can leave dark gaps between pools of light. Brightness, beam direction, weather resistance, and installation depth all affect performance. More light is not always better. Glare can hide the path’s edges, which is the opposite of the intended effect. Product specifications offer a useful starting point, but real conditions vary with trees, soil, and seasonal daylight. This guide explains the main types of Walk Path Lights, how their components operate, and what to consider when planning a safe, practical layout. Even careful planning can miss something. A nighttime check often reveals it.
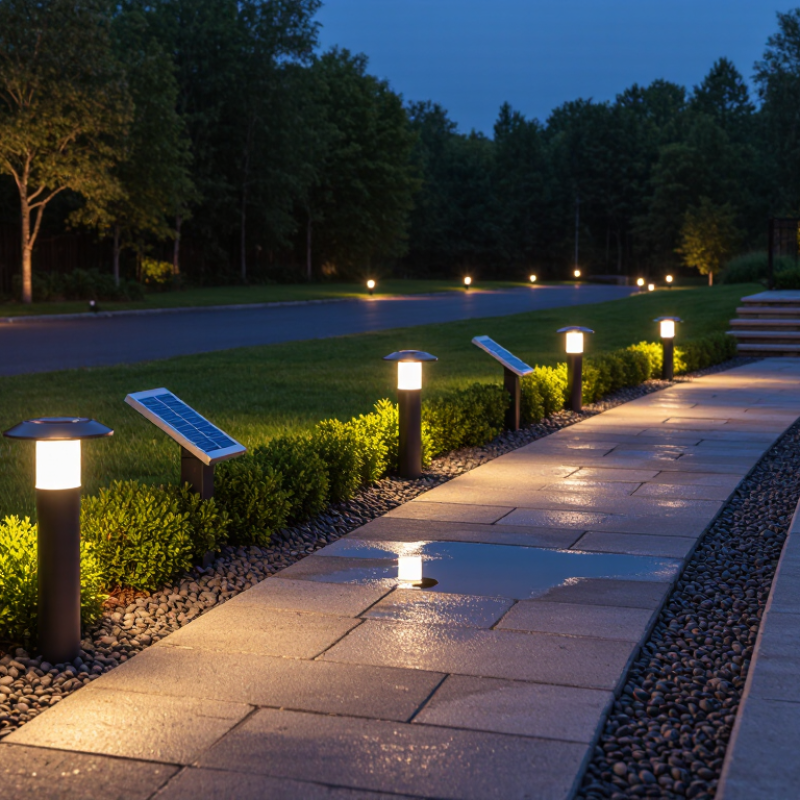
Walk path lights are low-mounted outdoor fixtures placed beside routes such as garden paths, steps, and driveway edges. They cast light across the walking surface, helping reveal changes in level, loose gravel, wet patches, and objects near the ground. Some have downward-facing lenses or small shields that reduce glare and direct light toward the route. They are not meant to light every corner. Small pools of light.
Their usefulness depends on spacing, height, and beam direction. A light set too far from the path may brighten a flower bed more than the walking area. Placed too close together, fixtures can create harsh bright spots; too far apart, they may leave dark gaps. On a curved path, staggered placement can make the route easier to follow. Walk path lights may run on wired power or rechargeable solar energy, and some switch on automatically at dusk. Output varies, so a light that looks bright in a product description may feel dim beside a dark hedge. Check the actual path after installation; shadows and uneven ground can change what the lights reveal.
| Topic | What It Means | What It Illuminates | Practical Detail |
|---|---|---|---|
| Walk path lights | Outdoor lights placed along or beside a walking route. They are also commonly called pathway lights. | Path edges, changes in direction, and nearby ground surfaces. | They help make a route easier to see after dark; they do not replace suitable lighting at steps or other hazards. |
| How they work | An electric light source converts electrical energy into visible light. A fixture directs some of that light toward the ground and surrounding area. | The illuminated area depends on the fixture’s height, lens or shade, light output, and placement. | A shield or downward-facing design can help limit glare and reduce light directed upward. |
| Low-voltage wired lights | These fixtures typically receive power from a landscape-lighting transformer that reduces household voltage. | Path sections connected to the installed lighting circuit. | They need wiring and a suitable power source. Installation should follow the equipment instructions and applicable electrical requirements. |
| Solar path lights | A small photovoltaic panel converts sunlight into electricity, which is stored in a rechargeable battery and used to power the light. | The ground around each fixture, according to its output and beam pattern. | Operating time and brightness can vary with sunlight exposure, season, battery condition, and weather. |
| Light output | Lumens describe the total visible light emitted by a source; they do not by themselves describe how evenly a path is lit. | A higher lumen value generally means more emitted light, but the fixture’s optics affect where it goes. | Choose output based on the path and surrounding conditions rather than relying on lumens alone. |
| Spacing and placement | Fixtures are arranged to provide a continuous visual guide without unnecessary glare or dark gaps. | Path edges and route features such as bends or entrances. | There is no universal spacing that suits every layout. Follow fixture guidance and check the result at night. |
| Color temperature | Measured in kelvins (K), color temperature describes whether light appears warmer or cooler. | The appearance of the path and nearby landscaping. | Lower kelvin values look warmer; higher values look cooler. Consistent color temperature can create a more unified appearance. |
| Typical purpose | Provide orientation and make the walking route more visible in low-light conditions. | The walking surface and nearby route boundaries, rather than distant areas. | Use separate, appropriate lighting where a task requires clearer visibility, such as at stairs or entrances. |
A walk path light is built from a few parts that guide and protect its light source. The housing holds the components and shapes how light falls across a path. A clear or frosted lens covers the lamp, softening glare and helping keep out dust and moisture. Many modern fixtures use an LED because it needs little power and produces limited heat. Small details matter. A loose lens or cracked seal can let water reach the electronics, so check the fixture after rough weather.
The power system depends on the design. A solar model has a small panel, rechargeable battery, and control circuit; the panel gathers daylight, while the circuit switches the LED on when the surroundings grow dark. Shade and short winter days can reduce runtime. Wired models instead connect to a low-voltage supply, often through a cable buried beside the path. A stake or base anchors the fixture in soil, while an optional dusk sensor or timer controls when it operates. Keep the lens clean and aim the light toward the walking surface, not eye level. A slightly crooked light may still work, but it can leave an uneven patch of brightness.
How it works: The solar panel charges the rechargeable battery during daylight. A light sensor and controller switch the LED on when it gets dark, while the housing and diffuser protect and spread the light.
Example energy balance: A 1 W panel receiving 5 peak-sun-hours can collect about 5 Wh; a 3.7 V, 2 Ah battery stores 7.4 Wh nominally; and a 0.5 W LED running for 8 hours uses 4 Wh. These are illustrative values—actual performance depends on sunlight, battery capacity, and operating conditions.
A walk path light receives power in one of two common ways: through a buried low-voltage cable or from a small solar panel. In a wired system, a transformer reduces household current to a safer low voltage, then sends it along the cable to each fixture. Many systems use a timer or light sensor to control the circuit. At dusk, a photocell detects falling daylight and signals the light to turn on. Simple, but cable connections and damp soil can complicate troubleshooting.
Solar models work differently. Their panel converts daylight into electricity and stores it in a rechargeable battery. After sunset, a light sensor activates the LED, drawing energy from that battery. Cloudy weather and shade can reduce charging, so placement matters; a light beneath dense leaves may glow weakly before dawn. The U.S. Department of Energy’s Energy Saver guidance says LEDs use at least 75% less energy and can last up to 25 times longer than incandescent bulbs. That comparison concerns the bulbs, not the full path-light system. It still helps explain why a small battery can run an LED efficiently. One practical caveat: sensor settings and battery condition vary, and not every light behaves exactly as expected.
Walk path lights guide people along garden paths, driveways, and steps after dark. Their housings direct light toward the ground, helping reveal edges without flooding nearby windows. Some run on a timer, while others respond to changing light or movement. A small pool of light can make an uneven stone path easier to read.
Sensors and controls decide when lights turn on and how long they stay lit. A photocell detects falling daylight and switches lights on at dusk. Motion sensors, often using infrared detection, activate lights when a person enters their range. Timers can set a steady schedule, while dimmers or connected controls adjust brightness. These systems need sensible placement: a sensor aimed at swaying branches may trigger repeatedly, and a low sensitivity setting may miss someone approaching slowly. In practice, setup is rarely perfect on the first evening. Check the path after dark and adjust.
Tips: Aim motion sensors across the approach, not directly down the path. Keep lenses clear of leaves and dirt. Test the lighting from different angles, then lower brightness if glare hides the path’s edges. A brief delay before lights switch off can help people reach the next fixture safely.
Walk path lights work best when their beams overlap gently, rather than leaving bright pools separated by dark gaps. Place fixtures slightly off the walking line and aim them toward the ground. This reduces glare and makes edges, steps, and changes in paving easier to see. A low wall, dense shrub, or parked vehicle can block light, so check the route from a pedestrian’s eye level after dark. Wet stone can reflect light sharply; a layout that looks calm on dry evenings may feel harsh after rain.
Solar fixtures need clear daytime exposure as well as sensible nighttime placement. NREL’s PVWatts technical model uses location-specific typical meteorological-year weather data to estimate solar output, underscoring why local cloud cover and seasonal sunlight matter. Shade from branches can shorten nightly run time, even when the path itself is well lit. The U.S. Department of Energy reports that LEDs use at least 75% less energy than incandescent lighting, but efficiency alone cannot compensate for poor aiming or a blocked solar panel. Small differences matter.
Tips: Test one fixture on a cloudy week before buying several. Trim back leaves, wipe panels, and check the path after rain. For wired lights, inspect connectors and cable routes; water or a long, undersized cable can weaken performance. Even careful spacing may need adjustment as plants grow.